6) Manual Edit
When you face personalized needs, manual editing helps achieve them. How do you use manual editing?
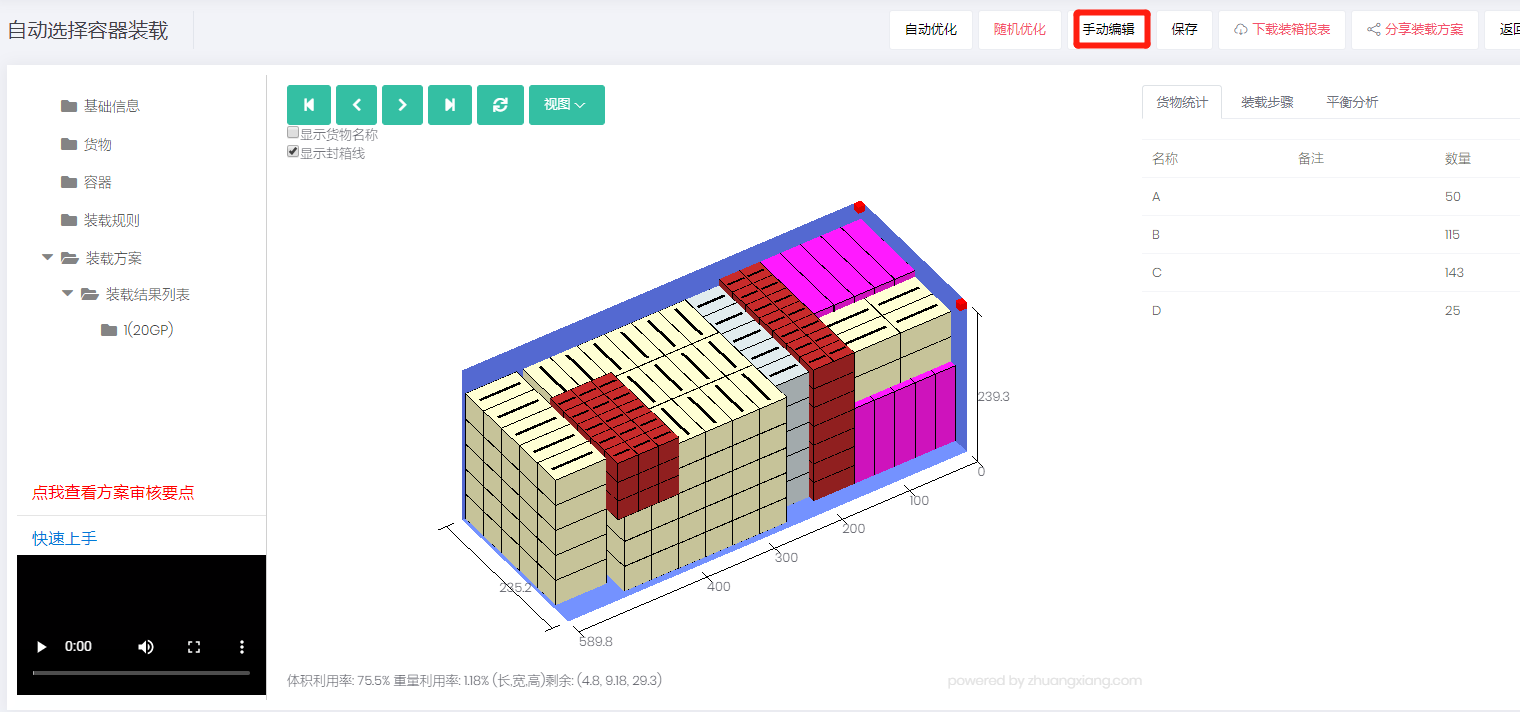
Click the Manual Edit button at the top of the software to enter the manual editing interface.
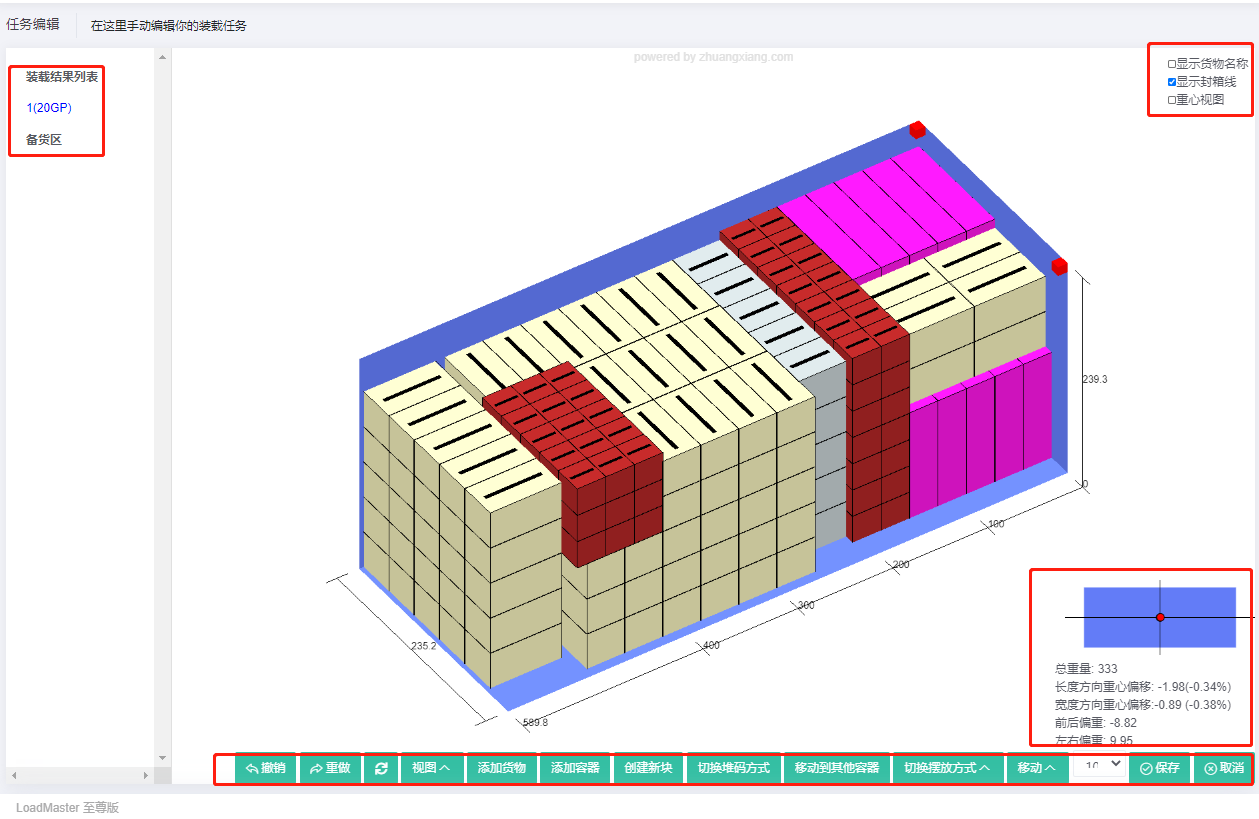
1) On the left is the container list and the storage area. The storage area stores cargo that could not be loaded because of oversize, or cargo you want to delete.
2) The middle area is the editing area, where most editing happens.
3) In the lower-right is the center-of-gravity offset diagram and real-time data.
4) At the bottom of the interface lists all the manual editing functions.
The most-used manual editing functions are described below:
1) How to move cargo
For example, move the last row of cargo out of the container and back in.
First click to select the cargo, hold the left mouse button and drag it out. Then drag it back in. When you get close to another cargo, it tends to "jump up".
So you need to hold Ctrl with the left hand (before it jumps), then drag — the cargo will not jump. Note: red outline = outside the container; green outline = inside the container.
2) How to swap cargo positions and change loading-block shape
Example: swap the positions of C and B.
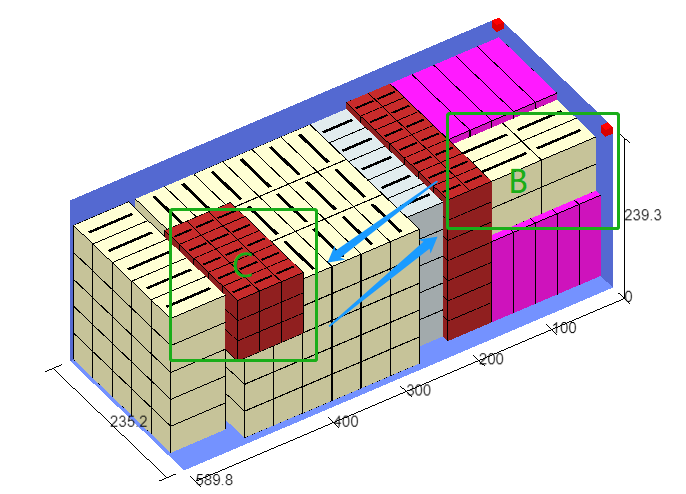
First click to select B and C respectively and drag them out of the container, while holding the left mouse button. To place them in the gap, you need to change the loading-block shape.
How do you change the loading-block shape?
You can change it via "Switch stacking method" or "Switch Load Orientations" at the bottom of the software.
Switch stacking method: changes the loading-block shape by varying rows/columns/layers without changing the placement mode.
Example: C's placement mode is stand and stacking method is 3×5×3. Click "Switch stacking method": its placement mode is unchanged (still stand), but the stacking method becomes 5×3×3.
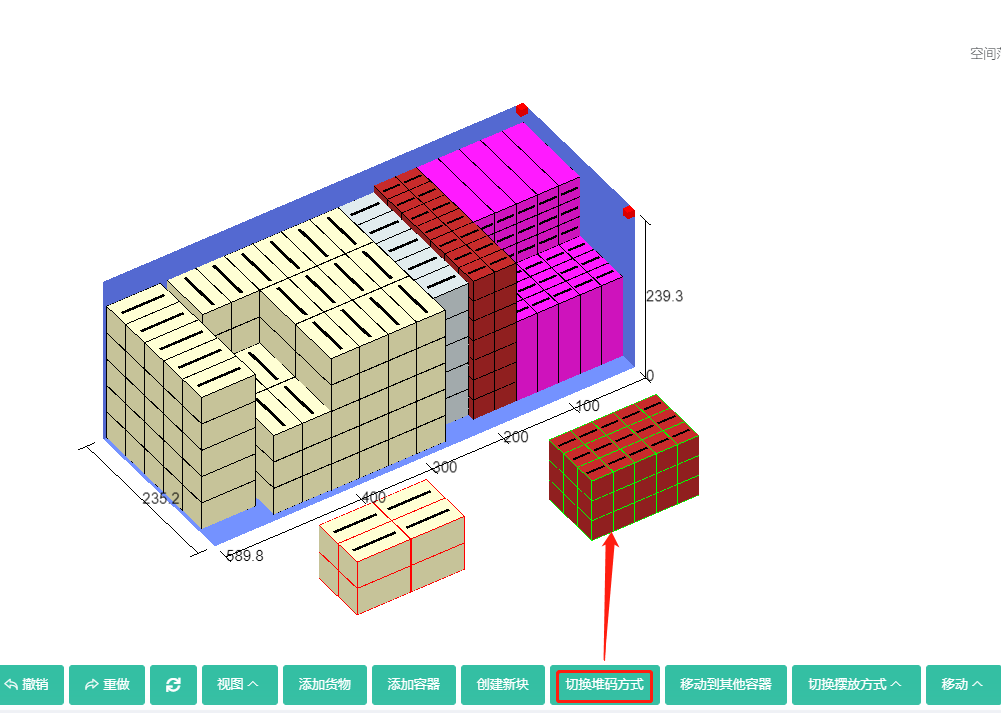
Switch Load Orientations: changes the loading-block shape by changing the cargo's placement mode without changing rows/columns/layers.
Example: B's placement mode is side, stacking method 2×2×2. Click "Switch Load Orientations" and choose "Stand_Rotate"; the stacking method stays 2×2×2.
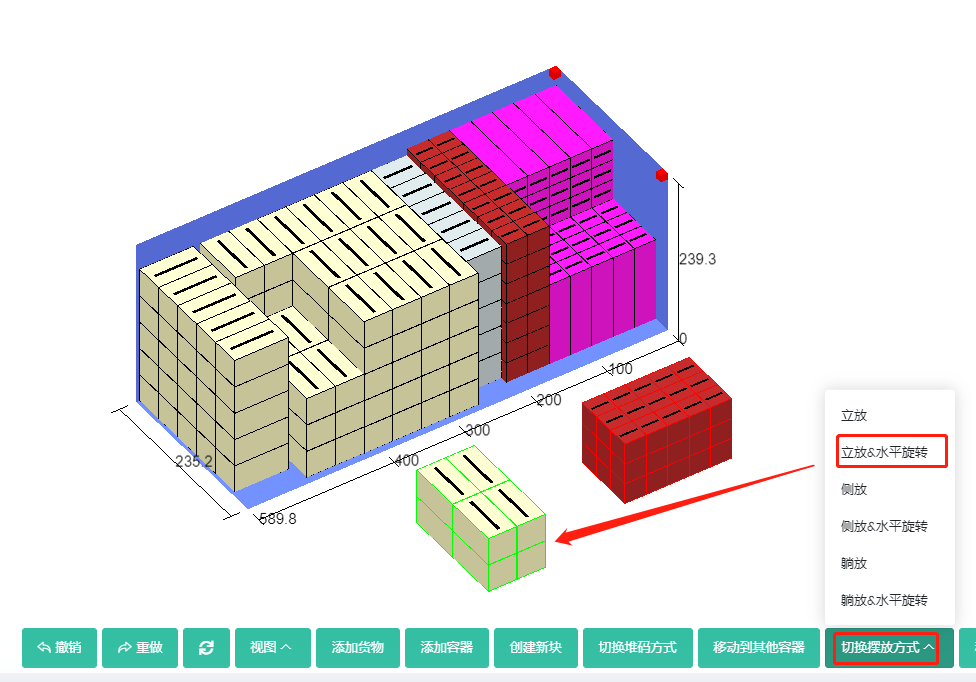
That is how to change the loading-block shape.
After placing B in the gap at the back, how do you judge whether the red C fits in the gap at the front?
First determine the loading block's size. Click C; in the upper-left you can see its space range. Subtracting in the length direction gives the loading-block length of 150. Similarly, the width is 90 and the height is 90.
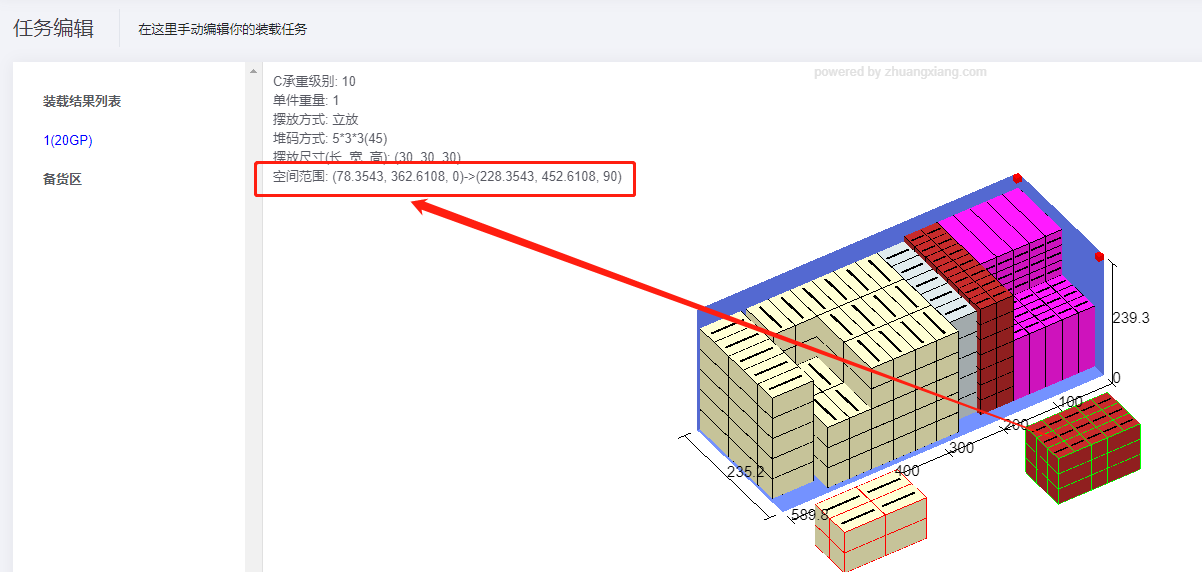
Then check the gap size. Click the cargo behind the gap; in the upper-left you can see that this cargo's length direction starts at 150 and the container front is 0, so the gap length is 150. Click the cargo to the left of the gap; the cargo's width direction ends at 120 while the container width is 235, so the gap width is 115 (> 90). Likewise the gap height is > 90, so C fits.
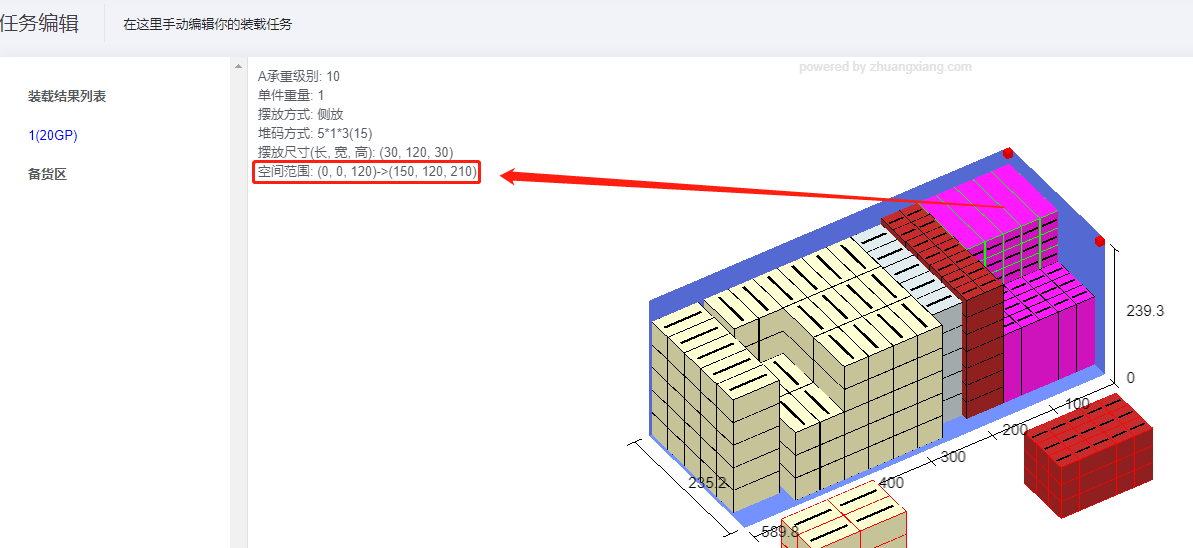
Place C in the front gap — the swap of B and C is complete.
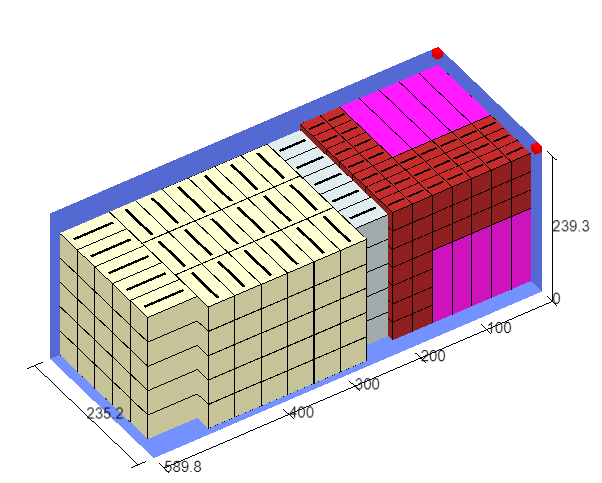
3) How to split or recombine loading blocks
Take the middle yellow loading block as an example. Select the block and right-click at the position where it should be cut.
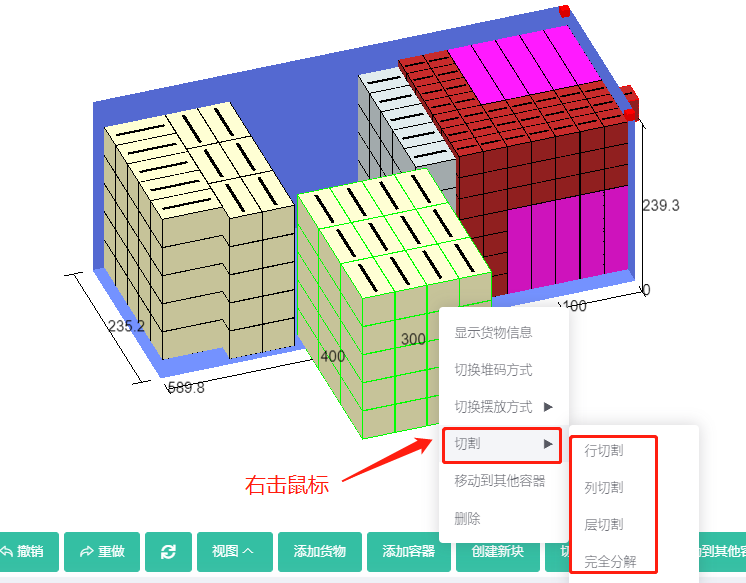
You can cut it in the row, column or layer direction. "Decompose completely" splits the block into individual items.
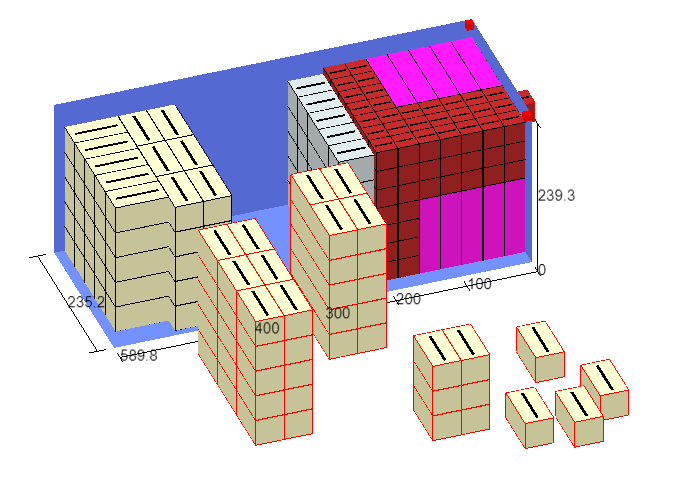
How do you create a new loading block?
For example, recombine the split yellow items into a 4-row × 3-column × 5-layer block with placement "Stand_Rotate".
Hold Ctrl with the left hand, and with the mouse select all the split yellow cargo. Then click "Create new block" at the bottom.
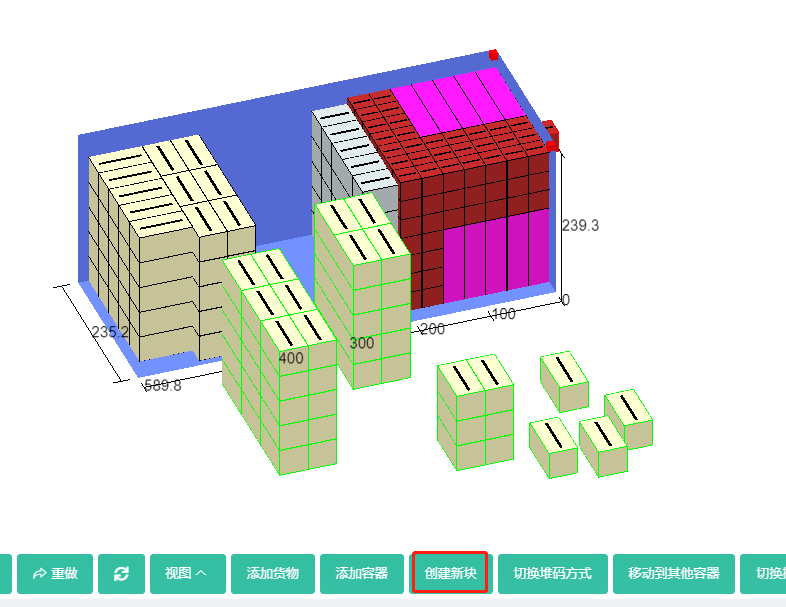
In the popup, set the placement to "Stand_Rotate"; set length quantity to 4 and width quantity to 3. Click OK — the block is created. Move it into the container.
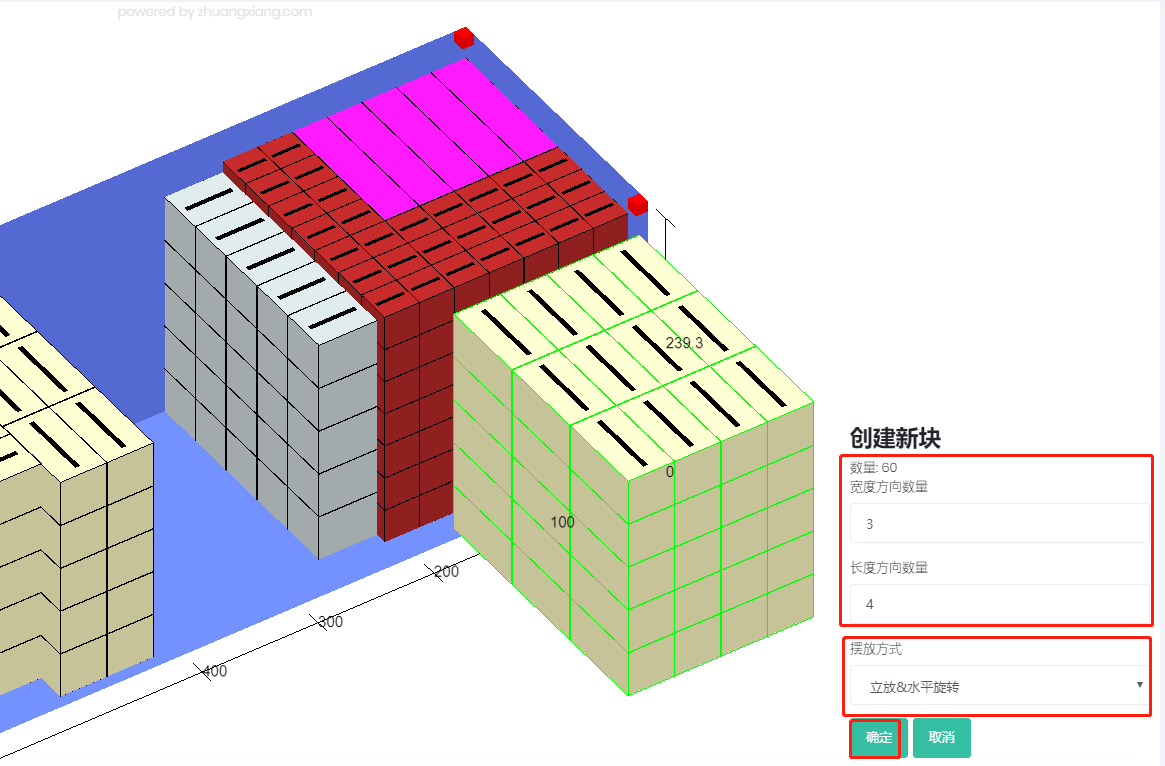
4) How to add cargo and containers
Example: add 63 more units of C into Container 1 and add another 40GP container.
Click "Add cargo" below the 3D view.
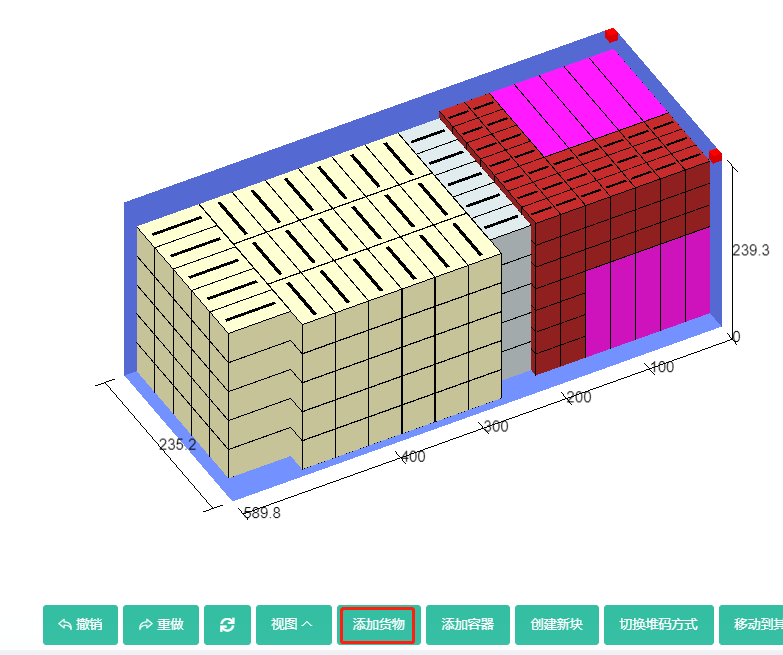
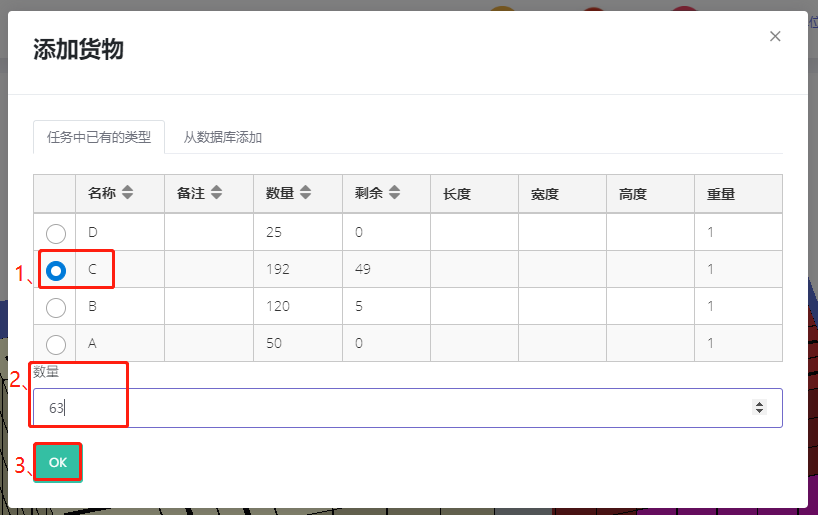
The popup shows types already in the task and cargo in the database. Find and select C, fill in 63 in the quantity field at the bottom and click OK — 63 units of C are added.
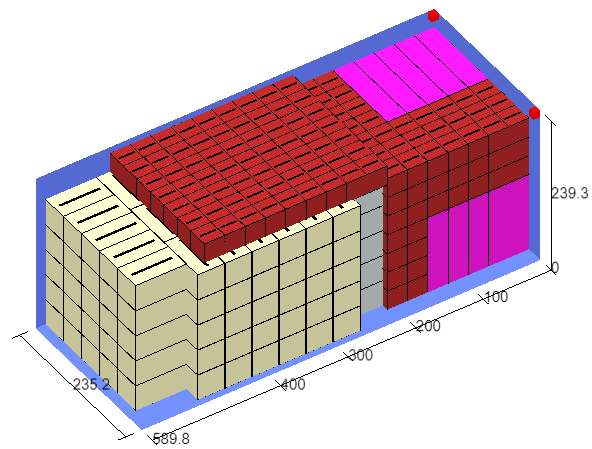
Build it into a new loading block and place it into the container.
Similarly, click "Add container" at the bottom, find and select 40GP under "Add from database" and click OK.
5) How to move cargo between containers
Example: move the last row of cargo into the 40GP.
Select the last row of cargo and click "Move to other container" below the 3D view, then choose 40GP in the popup.
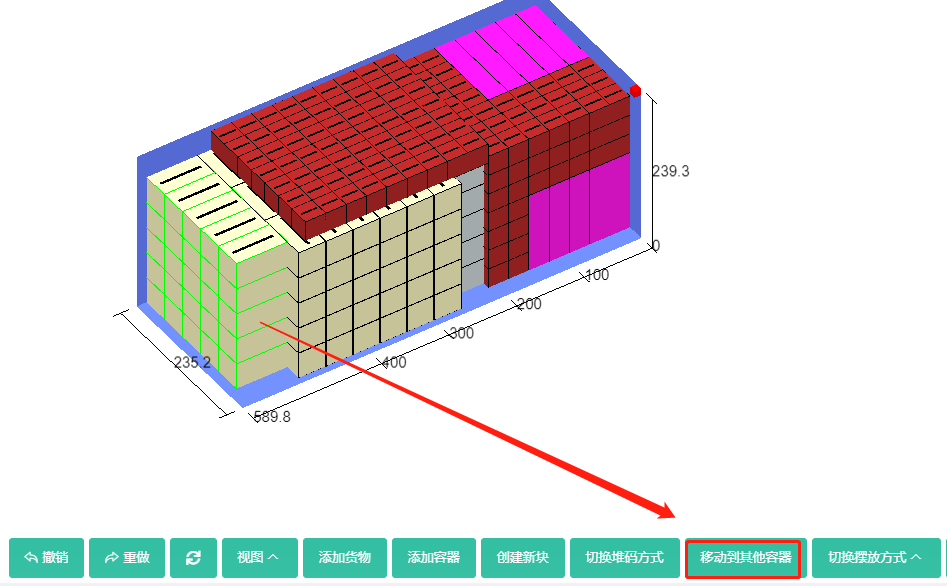
6) How to delete cargo and empty containers
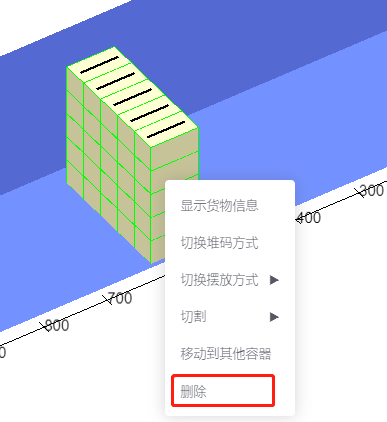
Example: delete the cargo in the 40GP.
Select the cargo to delete, right-click and click "Delete" in the popup. Empty containers are automatically removed when you click Save after finishing manual editing.
7) How to place cargo into an interior gap, adjacent to other cargo but without overlap
What if cargo cannot be dragged directly into a gap?
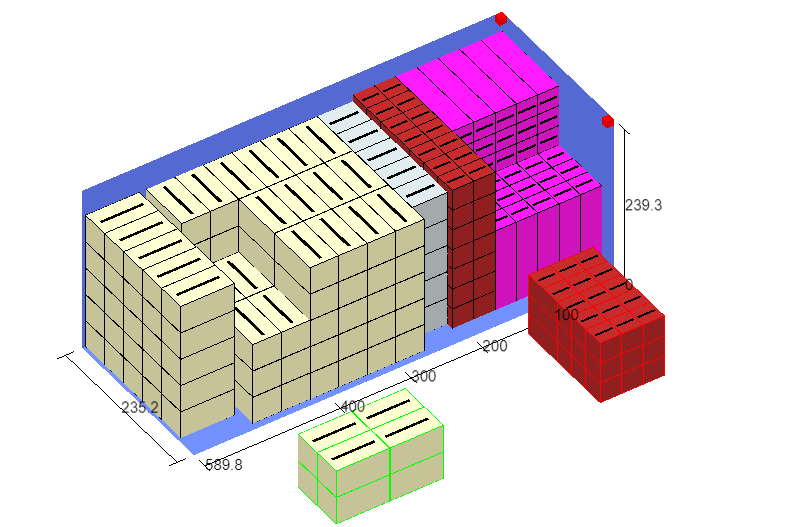
For example, place the yellow cargo into the gap below.
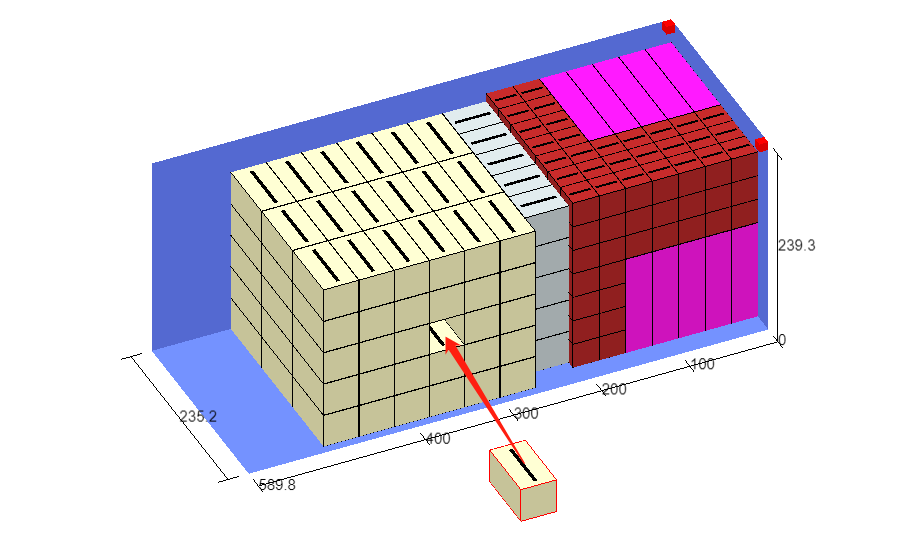
Select the cargo, hold Ctrl with the left hand, and click "Move up / Move left" under Move at the bottom with the right hand to roughly place the cargo into the gap.
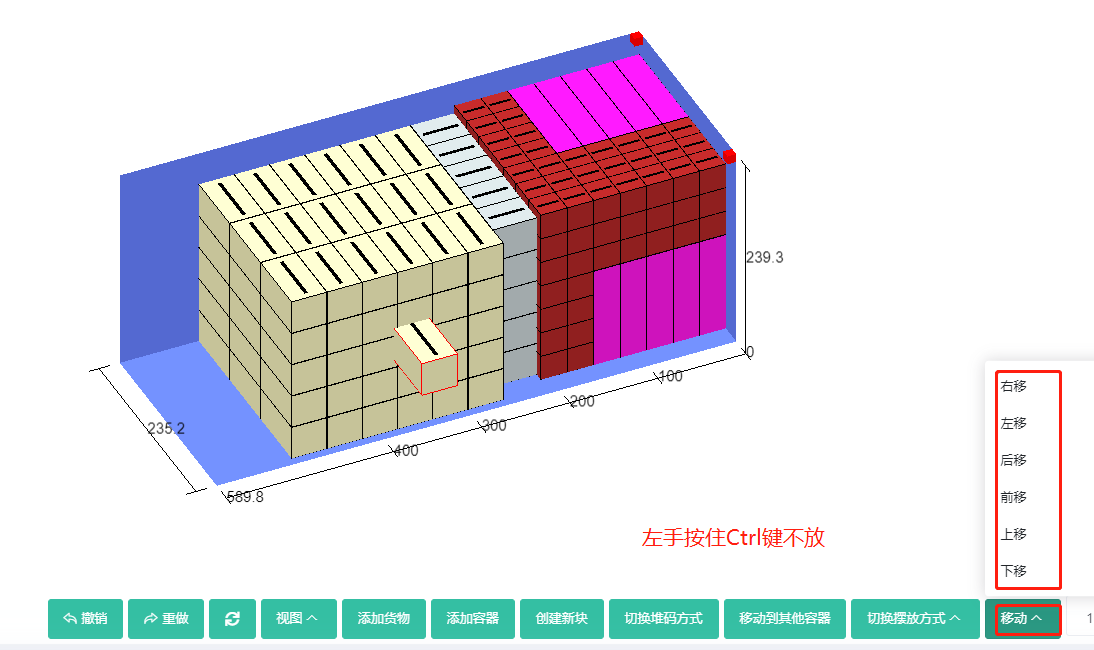
Then continue holding Ctrl and drag with the left mouse button to place the cargo into the gap. If the cargo overlaps and cannot be dragged, as shown below:
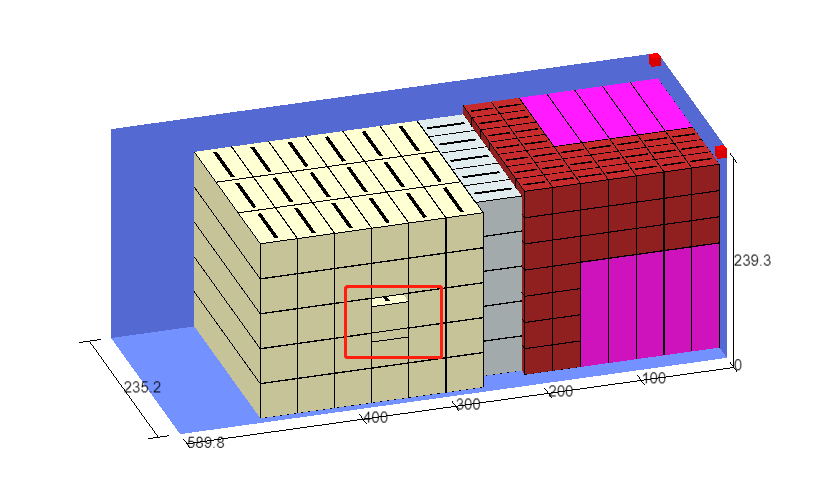
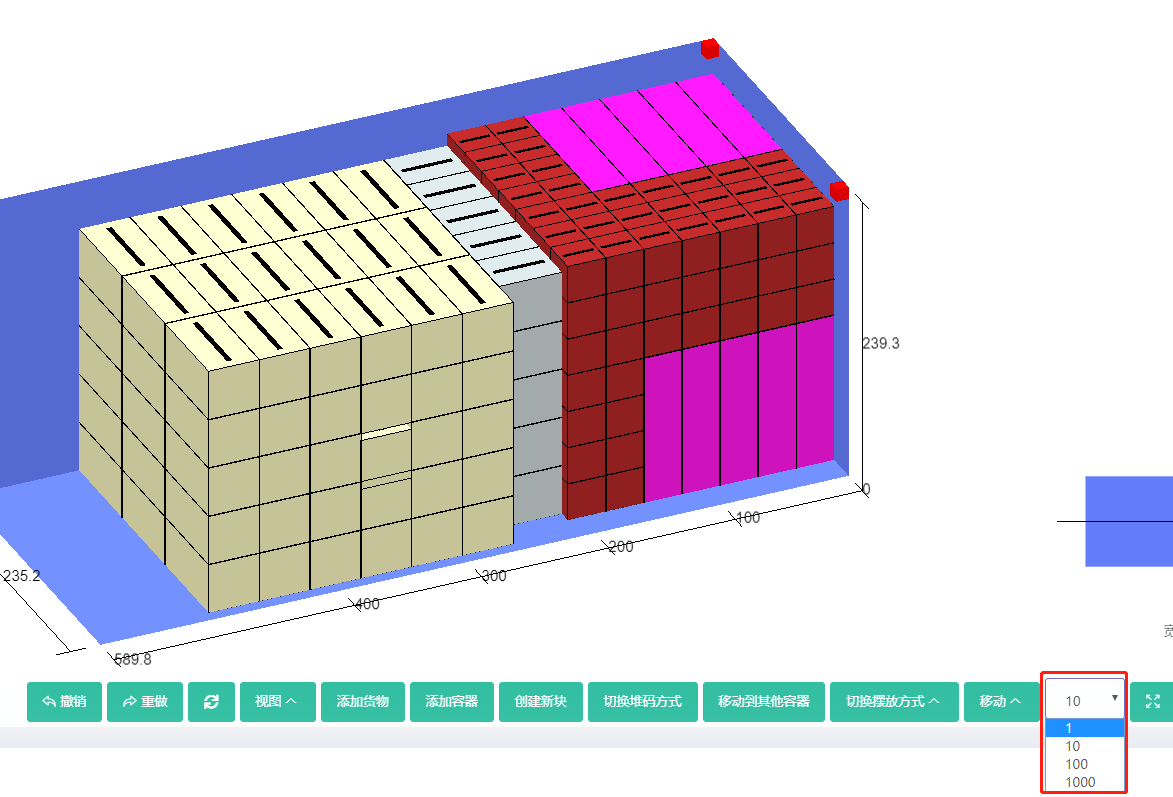
You then hold Ctrl with the left hand, and click the corresponding movement button under Move at the bottom with the right hand. Sometimes cargo still overlaps; in that case adjust the per-step movement step size at the bottom and try again.
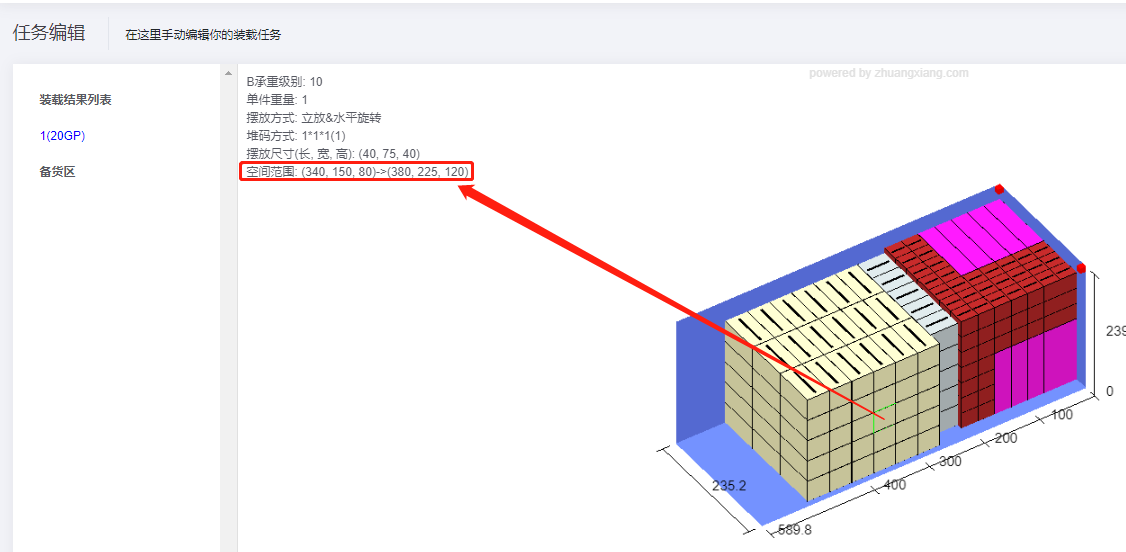
Finally, judge whether the cargo is adjacent without overlap based on space occupancy. Select the cargo below it; in the upper-right you can see its height direction ends at 80, while the current cargo starts at 80. Check the other directions similarly.
When manual editing is complete, click "Save" in the lower-right to see the edited plan.
A few manual-editing tips:
1) Red cargo outline = outside the container; green outline = inside the container.
2) Moving cargo: hold the left mouse button to move.
3) Positioning cargo: hold Ctrl with the left hand and the left mouse button with the right hand. Release only when the position is set, and the cargo will not jump.
4) When creating a new loading block, hold Ctrl with the left hand and click with the mouse to select multiple blocks.
5) Click the Undo button to cancel the current operation and return to the previous step.
A few caveats:
1) After manual editing, clicking "Loading Result" and recomputing discards the manual-edited plan.
2) If you cannot move cargo out of the container, the Ctrl key may be stuck. Tap it firmly and try again.
3) Sometimes mouse quality affects control of cargo movement; try a different mouse.
4) Since this is the first time using the manual editing feature, users may feel unfamiliar with it, and it may seem somewhat cumbersome initially—which is perfectly normal. Once you have used it for a week, you will find that the operation is highly intuitive and flexible.