Import by Order Mode
When cargo dimensions would not change even when orders change, you can maintain commonly used cargo data in the cargo database to avoid re-entering data each time. When designing a plan, you only need to enter cargo names, quantities and the relevant parameters for the order — dimensions, load orientations, Stacking Orders and other info already in the database would be fetched automatically.
Specific steps:
1) Maintain cargo data in the database. On the software home page, click "Cargo management" on the left to enter the cargo database. You can use either "Create New Cargo" or "Import from Excel".
① Add directly: when there are few cargo types, add one by one.
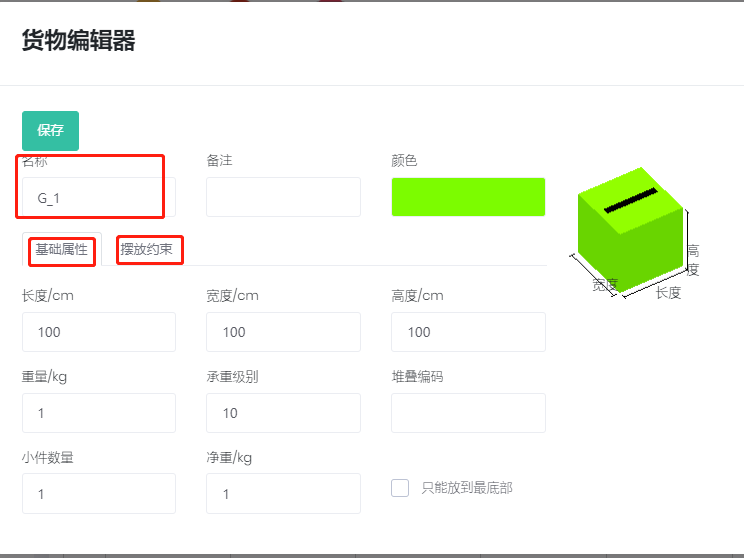
Click "Create New Cargo" and edit the cargo's basic properties (name, dimensions, Stacking Orders, etc.) and placement constraints (load orientations, Max Stack, etc.) in the popup.
The cargo name must be unique. Then click Save.
② Batch import: when there are many cargo types, batch-import via Excel.
First click "Get Cargo Type Import Template" to download the template and save it locally.
Then fill in the import template. When done, return to the software and click "Import from Excel", find the completed template and click Open — cargo info would be added to the database. Template instructions:
- Cargo names must be unique; no duplicates. Duplicates are auto-detected and the row numbers reported.
- Note unit conversions.
- Weight cannot be empty. For light cargo of unknown weight, enter 1.
- The template defaults to allowing all six placement methods (any orientation). For disallowed methods set 0. Allowed methods: set 1 or leave it blank.
- Stacking Orders: set by gross weight per box or density to achieve "heavy below, light above". It is a relative value; the larger the value, the stronger the bearing capability and the lower the position.
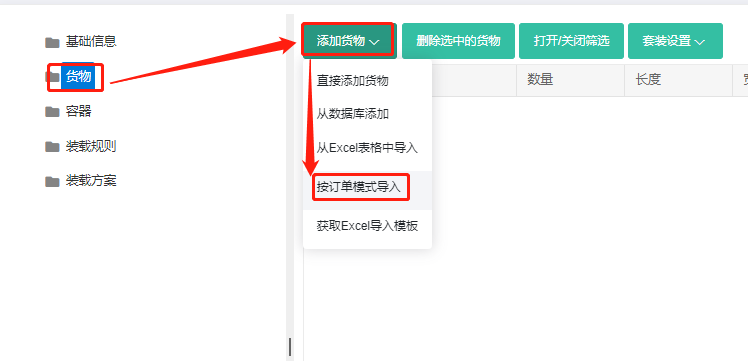
2) Once cargo info is in the database, when designing a plan go to the Cargo interface and click Add cargo → Get import template to download the template.
3) In the opened template, copy and paste the names and quantities of the needed cargo, then set parameters as required (parameters already defined in the database don't need to be set again).
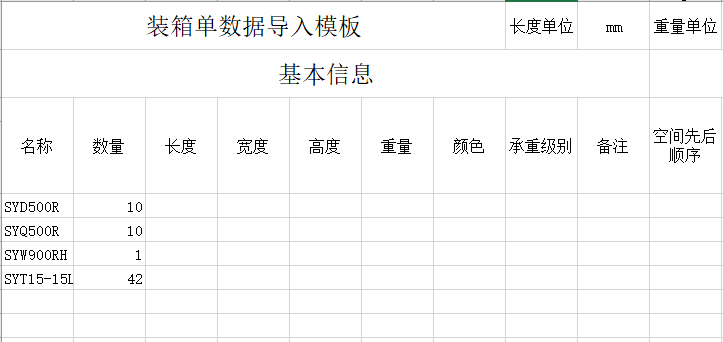
4) After finishing the fill-in, save and close the template, return to the Cargo interface, click Add cargo → Import (Order Form Mode), find the completed template in the popup and click Open. The software would fetch data from the database by cargo name.