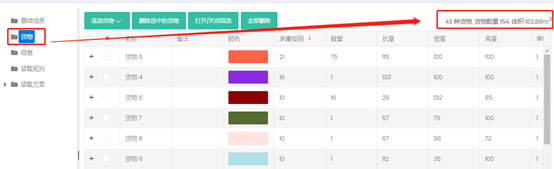
2) Cargo
The Cargo interface is mainly used to add cargo that needs to be loaded, edit basic cargo information (name, quantity, length/width/height, etc.), and define each cargo's placement method and loading attributes such as heavy-light pairing or loading sequence according to the loading requirements.
The page is divided into two parts: function buttons on top, cargo list below.
1) The function buttons on top include Add Cargo, Delete Selected Cargoes, Turn on/pff Filter , Set Loading and Delete All.
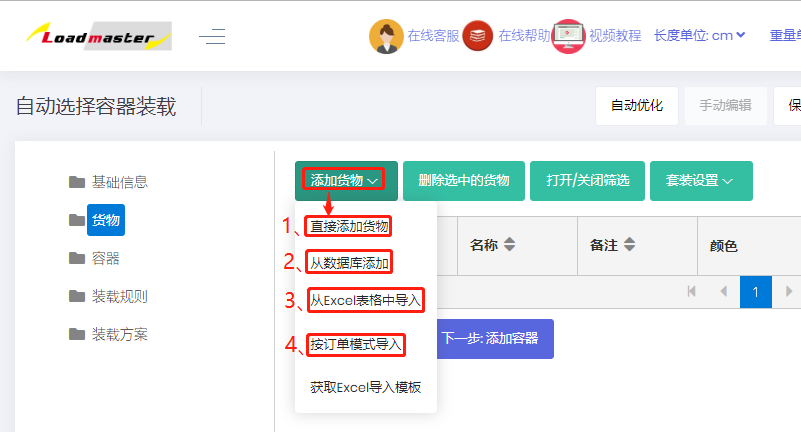
① The Add cargo button allows cargoes to be added in different ways. There are four methods: "Directly Add", "Import from Database", "Import from Excel", "Import (Order Form Mode)". See Methods of adding cargo for details.
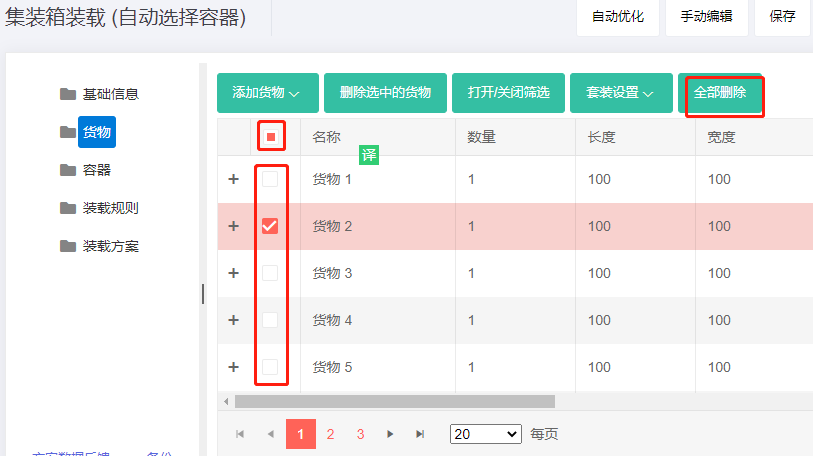
② The Delete selected cargo button allows selected cargo to be deleted.
- Check the boxes in front of cargo names and click "Delete selected cargo" above the cargo list to delete multiple items at once.
- Click the box at the top-left of the cargo list to select all cargo on the current page, and click the arrow below to adjust how many rows are shown per page.
- Select any cargo, then click "Delete all" that appears above the list to delete all cargo at once. Note: when no cargo is selected, "Delete all" is hidden.
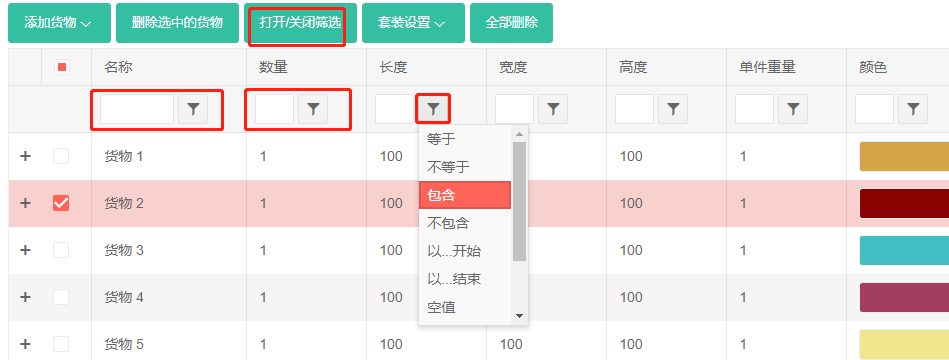
③ The Turn on/pff Filter button allows to toggle the keyword filter feature.
④ The Set Loading button allows to add or remove a set of cargo.
When a product is split into multiple boxes, or a set consists of several different products, these boxes must be loaded in proportion during container stuffing. This situation can be handled using the "Set Loading" function. For the entered cargo, you can define their set relationships. For detailed steps, please refer to 'Defining Set Cargo'. see Set Loading.
2) The cargo list below shows the already-added cargo. You can view or modify information (name, quantity, length/width/height, etc.), placement method and loading parameters.
① On the left of each row there is a plus button: click it to view and edit Load Orientations, Support Others,Max Stack, Max Overhang Ratio, etc. See Cargo placement constraints for parameter details.
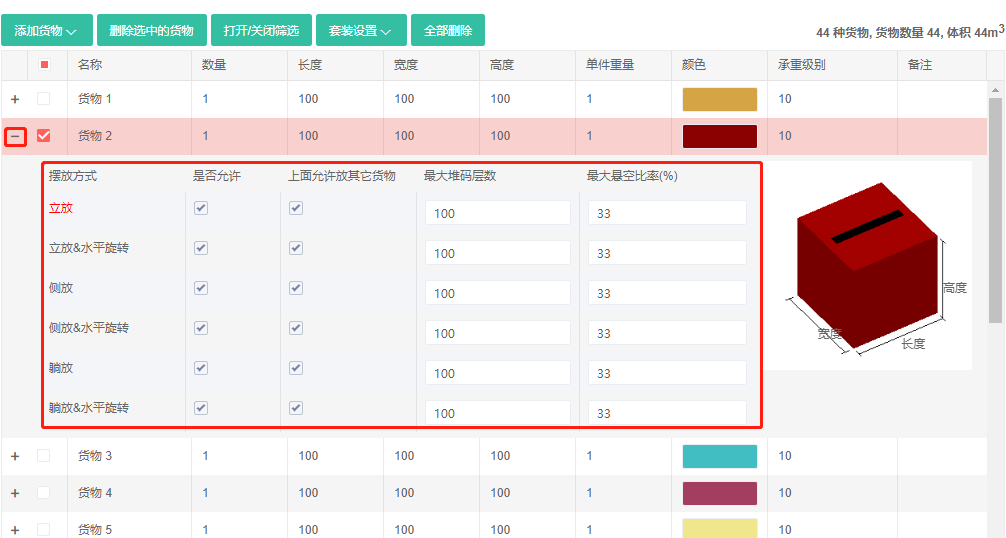
② On the right of each row are the cargo name, quantity, length/width/height, weight, Stacking Orders, Loading Sequence and other info, which can be edited. See the documentation for parameter details.
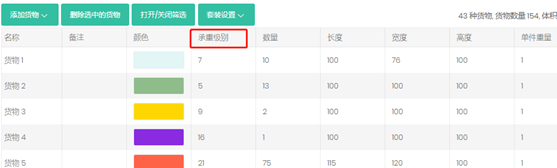
- You can rearrange the columns. For example if a load plan has the requirement of "Stacking Orders", you can drag it to the left for easy viewing. Click "Stacking Orders", hold the left mouse button and drag to the desired position.
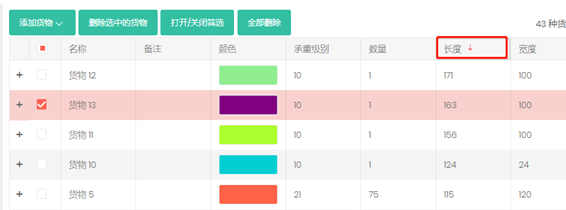
- You can sort by any parameter. For example to sort by cargo length, click the "Length" header — cargo will be sorted from large to small; click again to sort small to large.
- In the upper-right of the cargo list, you can see the total quantity and total volume.