b. Assigning and managing share groups
After multiple users are created under one tenant, users can be grouped and the operations they can perform on tasks can be restricted. For example, group A has several subsidiaries. To make management convenient, the group shares one tenant, but data is not shared between subsidiaries — this is when share groups are needed.
Enabling the group feature
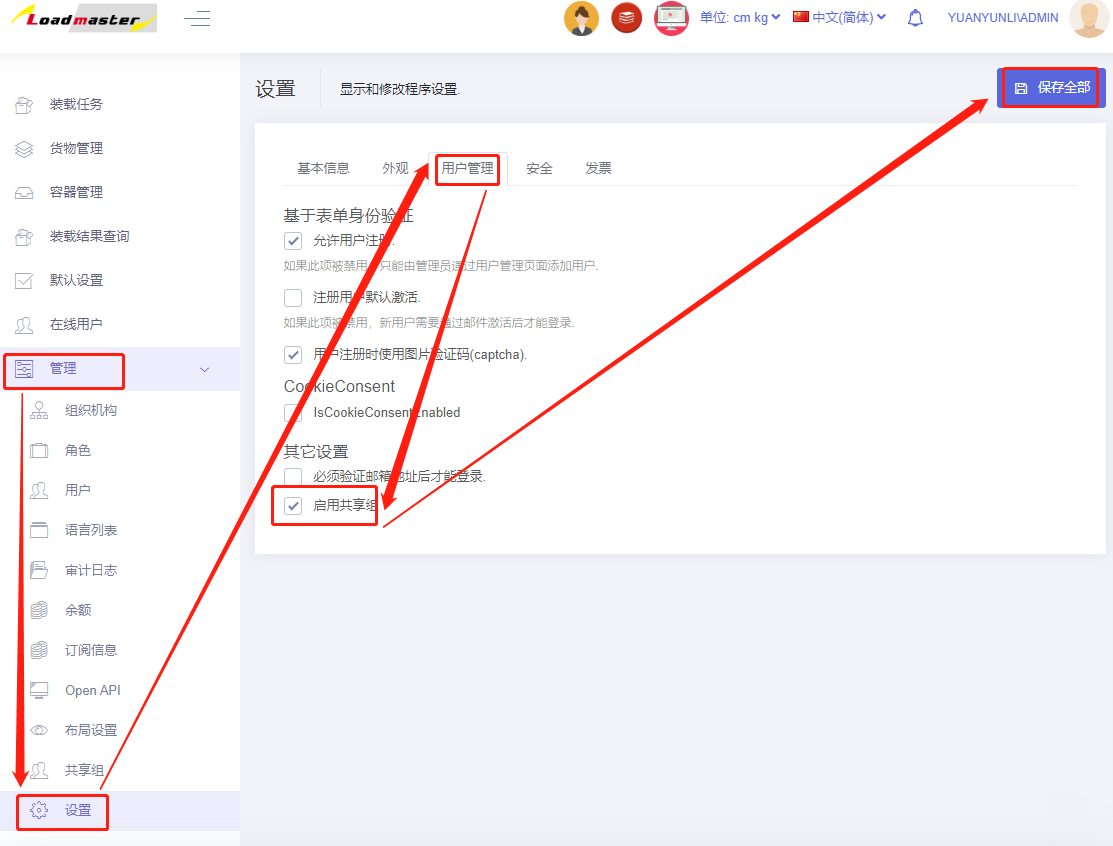
The user group feature is disabled by default and must be enabled manually by the tenant administrator. Under Administration > Share Group > User Management, check "Enable Group Share". When the group feature is disabled, users in the tenant can see all tasks.
This setting can only be configured by the administrator; other users do not see it.
Group management
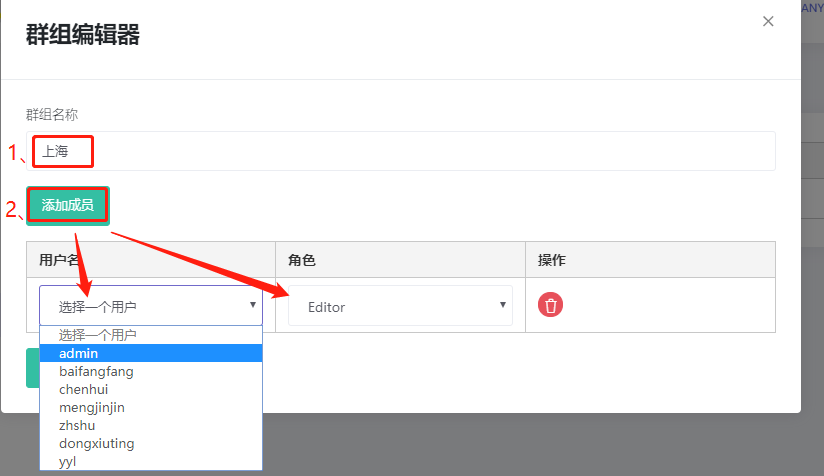
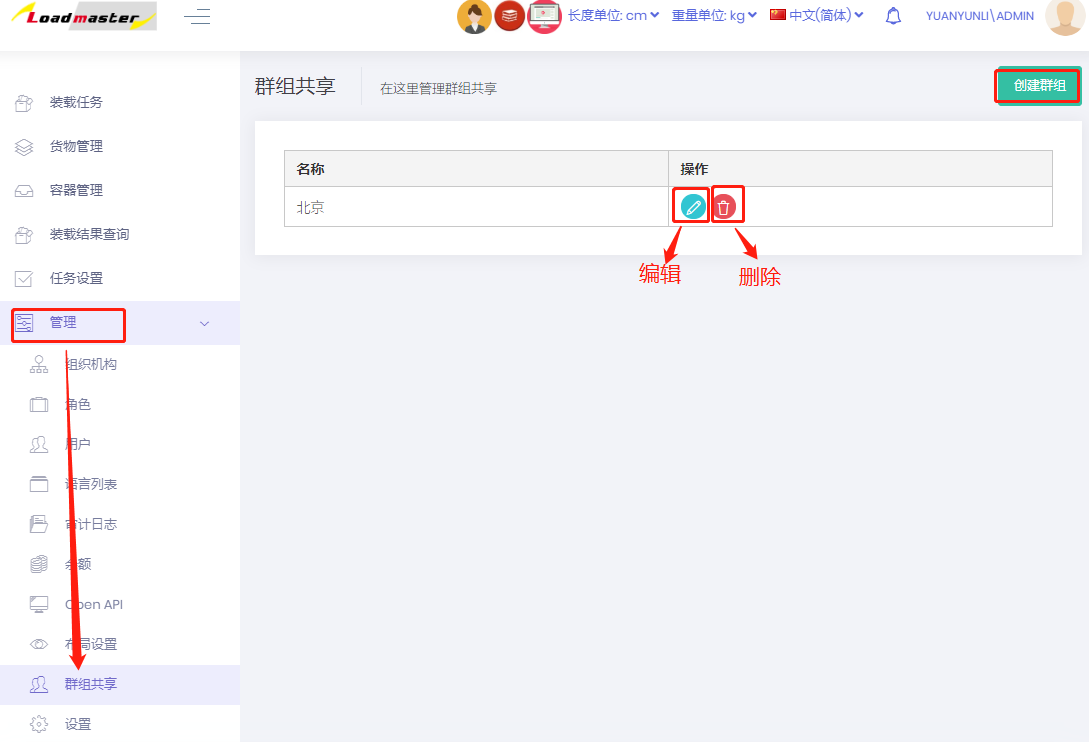
Under Administration > Group Share, click "Create Group" in the upper right.
In the popup, set the group name, add members to the group and define member roles, then click OK.
A created group can be modified or deleted; modifications take effect after members sign out and sign in again.
Member roles
- Each group member has one of 4 roles: Admin, Manager, Editor, Guest. Permission ranking: Admin > Manager > Editor > Guest.
- Approve is a state indicating that the plan has been reviewed and approved and does not need modification. Clicking the Approve button changes the task to the approved state.
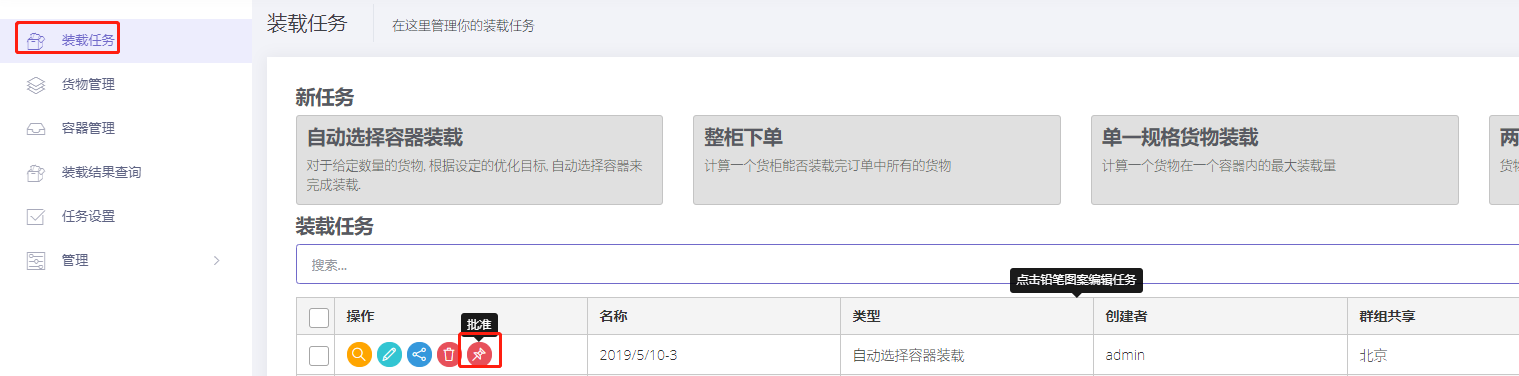
- The tasks a person can approve are those not yet approved that belong to a "group in which the person has at least Manager rights".
- Each person can see the tasks they created and all tasks belonging to a "group they belong to".
The tasks a person can edit are:
          Not-approved tasks: tasks the person created, or tasks belonging to a "group in which the person has at least Editor rights".

          Approved tasks: tasks belonging to a "group in which the person has at least Manager rights".
The tasks a person can delete are:
          Not-approved tasks: tasks the person created, or tasks belonging to a "group in which the person has at least Manager rights".
          Approved tasks: tasks belonging to a "group in which the person has at least Admin rights".
- When a user changes the group of a loading task, they can only change it to a "group in which they have at least Editor rights".
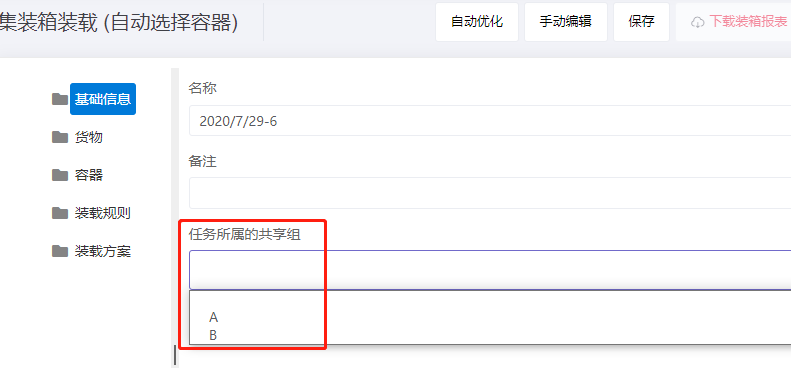
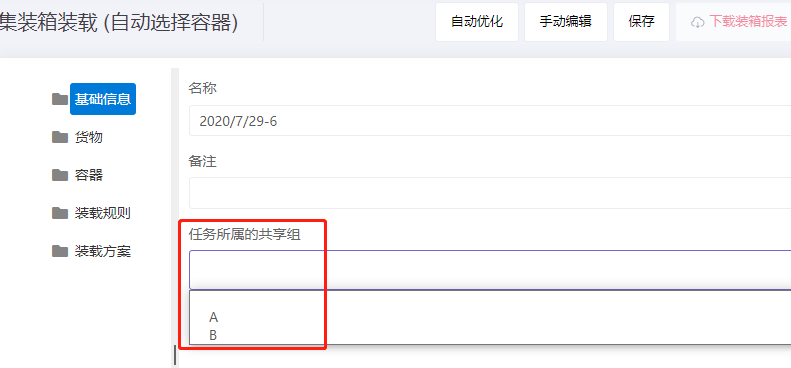
After creating a task, the group it belongs to can be selected in the Basic Information interface.
Case study
A corporate group has four subsidiaries: A, B, C and D. Data is not shared between the subsidiaries. The headquarters administrator wants to view and manage all tasks of A, B, C and D. How is this set up?
The headquarters administrator uses the "admin" account to create the required users for the subsidiaries. For detailed steps, see Multi-user Data Sharing. Following the steps above, enable the group feature and create the four groups A, B, C and D.
Add the headquarters administrator to all four groups A, B, C and D. In other words, to see a group's data you must be a member of that group.

After becoming a member, when anyone creates a task and computes a plan, they must select the "share group the task belongs to". If not selected, only the creator can see the task; other group members cannot see it.
- Role assignment: there are 4 roles — Admin, Manager, Editor and Guest — that can be assigned to group members. Permission ranking: Admin > Manager > Editor > Guest.
1) Guest can only view tasks created by other members in the group; Guest can also edit, delete and share their own tasks, but cannot select the group the task belongs to, so other group members cannot see them.
2) After a non-Guest group member creates a task and assigns it to a group:
Before the task is approved:
Admin and Manager can approve, edit, delete and share all tasks.
Editor can edit and share, but can only delete tasks they created.
Guest can only view.
After the task is approved:
Admin can edit, share and delete.
Manager can edit and share.
Editor and Guest can only view.