2. Steps for Designing a Loading Plan
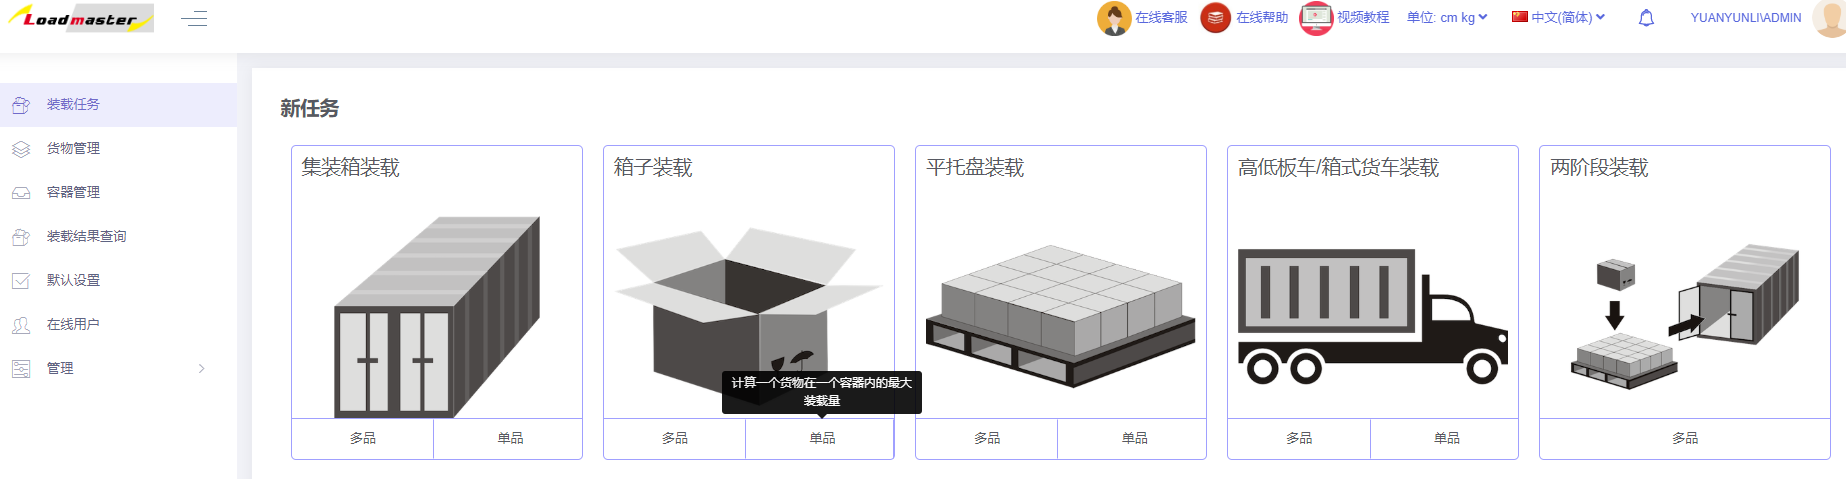
After signing in, enter the "New Task" interface. Users can choose an appropriate task type based on the current business need (see Loading Task for details).
Click to enter.
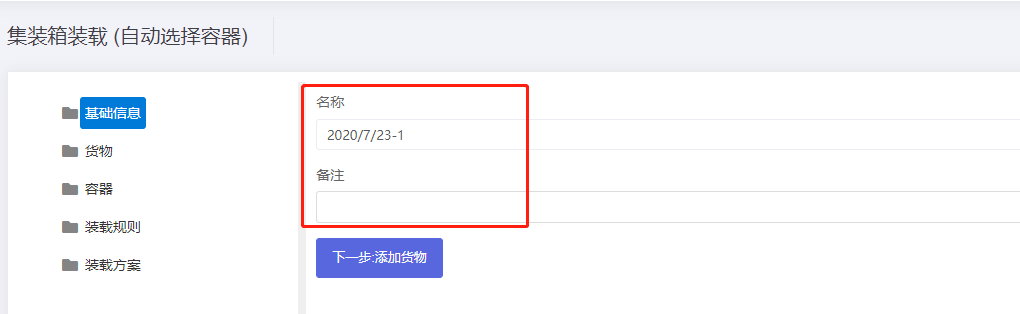
You first enter the Basic Information interface. The fields here are optional and can be left blank; you can also fill in the order number, date, destination etc. for easier future lookup.
Now begin the plan design:
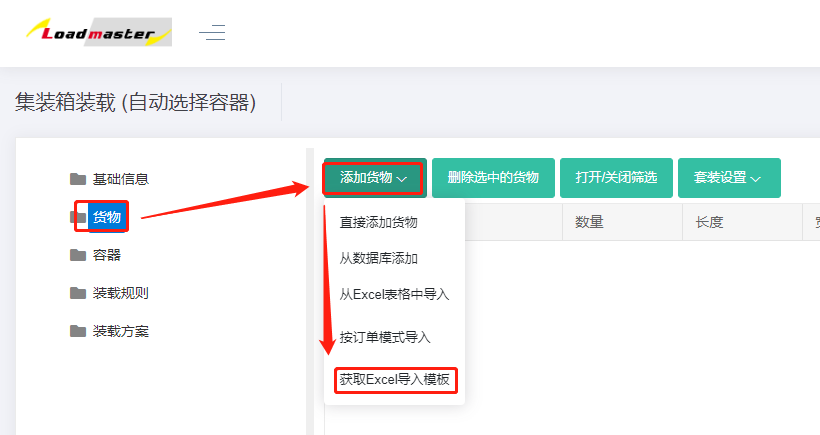
Step 1: Add cargo information. Click Cargo on the left to enter the Cargo interface.
When there are few kinds of cargo, you can add them one by one via "Directly Add" under Add Cargo.
When there are many kinds of cargo, you can batch-add them via "Import from Excel" under Add Cargo. The steps are:
1) First, click "Get Excel import template" under Add Cargo to download the fixed template, and save it on your computer.
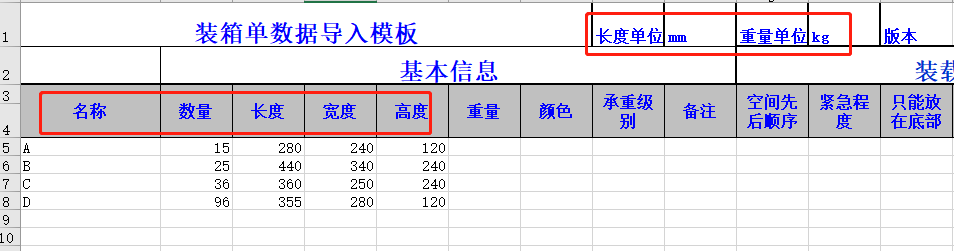
2) Then fill in the template (the downloaded template opens automatically). Copy in cargo name, quantity, length/width/height, weight (gross weight per carton) — these are required fields. Note unit consistency. Then define corresponding parameters according to your loading requirements; for details of each parameter see the help documentation.
3) After completing and saving the template, close it and return to the Cargo interface. Click "Import from Excel" under Add Cargo, find the completed template in the file dialog, and click Open. All cargo data is then imported into the software.
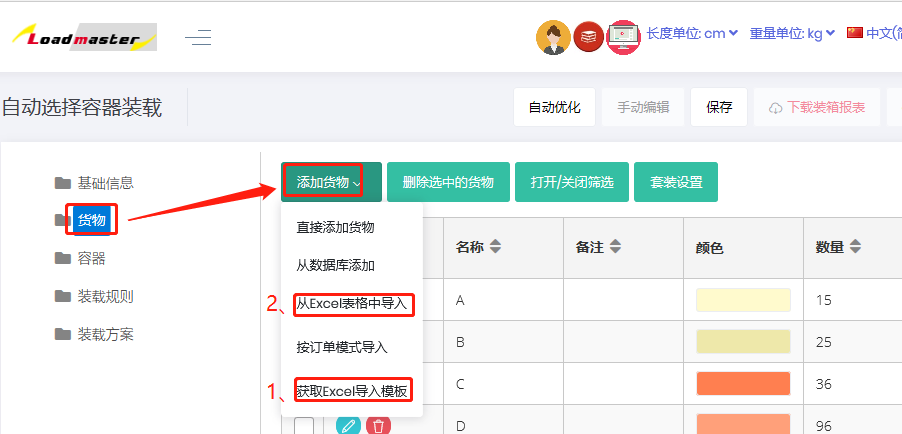
Step 2: Add container information. Click Container on the left to enter the Container interface.
Since the database already contains information on common containers, you can use "Import from database" to select the required container.
If the required container is not in the database, you can use "Add container"-"Container" to add and edit it directly. 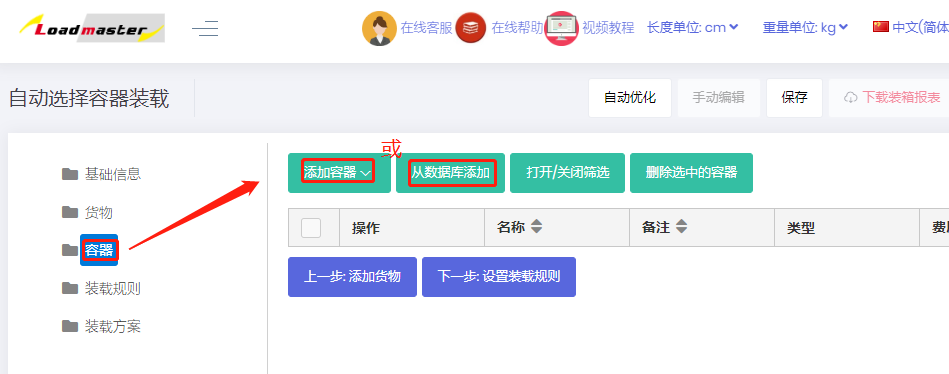
Then set the container's properties. For example, you need to set Corner Castings and Reserved size . For details, see the help documentation. 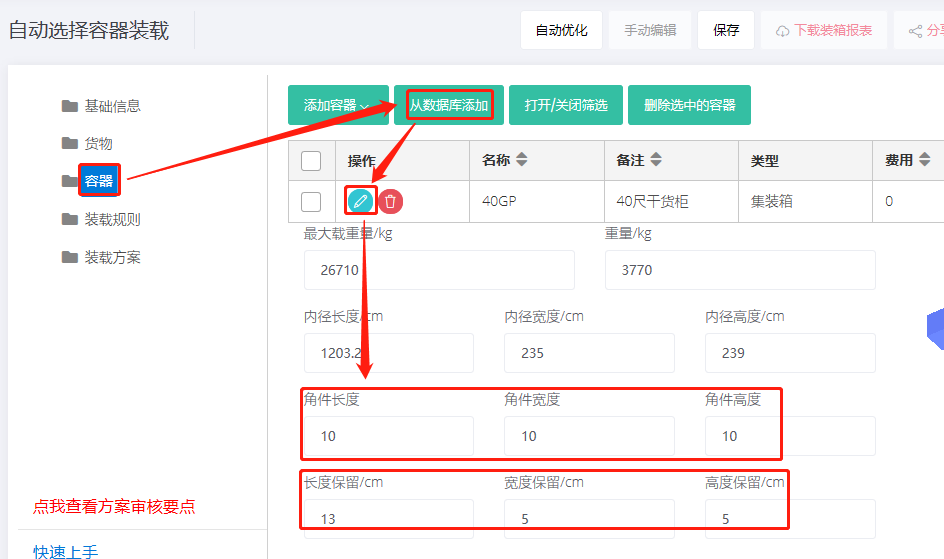
Step 3: Configure loading rules. Click Loading Rules on the left to enter the Loading Rules interface.
See the help documentation for details on loading rules. If there are no special loading requirements, the defaults are fine. 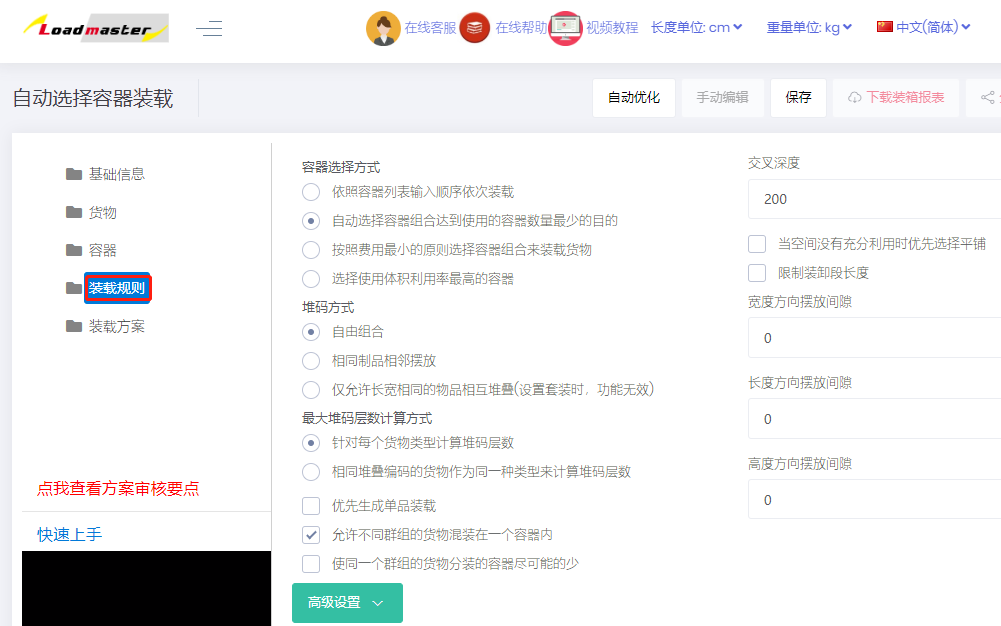
Finally, click Loading Result at the top, or click Loading Plan on the left to compute. After the calculation finishes, the container list on the left shows how containers are used for this batch of cargo. Click the container name to view the 3D loading visualization. 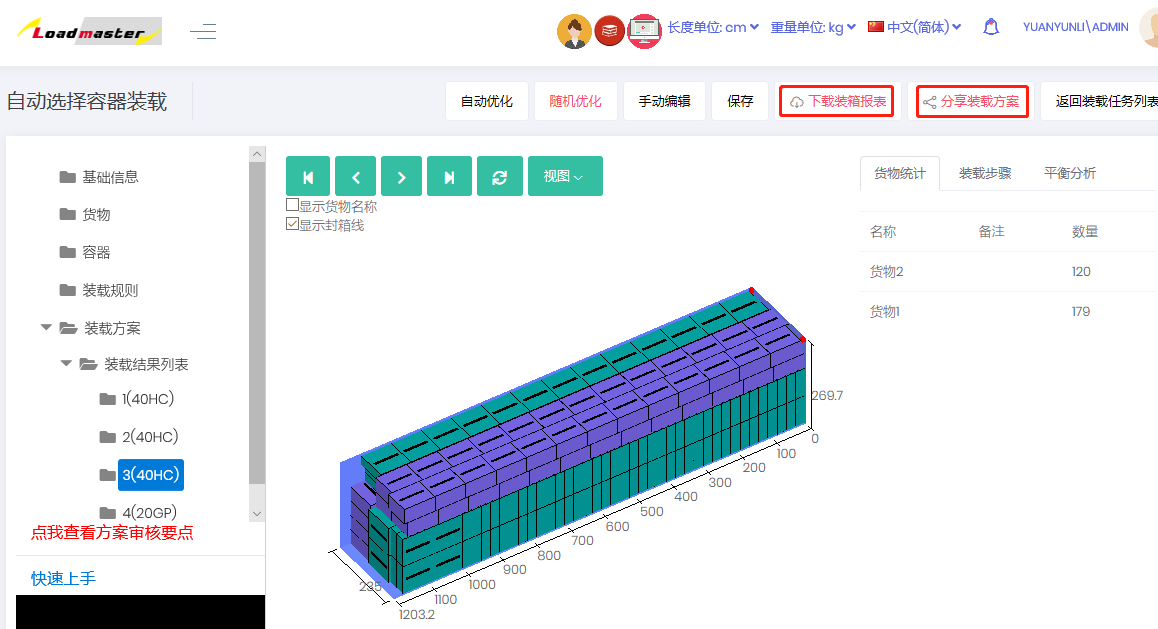
After the plan is reviewed, click Share Task to view the loading steps on your phone for on-site loading guidance, or to share the loading plan with colleagues or customers. Click Generate Loading Report to produce a packing list and customs declaration. See the help documentation for detailed steps.